VISSIM
Integration of PTV VISSIM incorporates traffic analysis and planning in your preliminary design.
Export
Creating conceptual design for export.
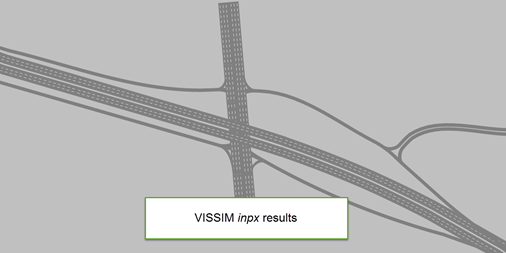
Prior to exporting the VISSIM input (*.inpx) the conceptual design must be complete. This includes all Roads, Ramps, Intersections, Ramp Connections, Bridges, and Pavement Lane Markings.
Be sure that lane numbers match so links and nodes can map properly within the VISSIM product.

From the Back Stage menu, select Export.
Browse to the desired folder and provide an export filename. (No file name extension is needed).
The export creates several file types.
VISSIM data input and animation creation
Now that the *.inpx file is created, traffic must be created within the VISSIM product.
Start VISSIM.
Open the *.inpx file created during the export process.
Using VISSIM, create vehicle inputs, define vehicle paths.
VISSIM entities classification when importing animations
In general, most of the VISSIM content is like Lumen. VISSIM has this model selector to define the models that will be part of the vehicle composition in the model:

Note that the VISSIM content has a prefix tag to the name. When importing the animation, the classification is based on that. It is a naming convention and models can be renamed, some important information to define your own 2D/3D models in VISSIM follows.
Every content name needs to be in the format of "<tag> - <modelname>". The tag list is as follows:
|
Car |
Maps to content in the "Cars" and "Sports Cars" folders in lumen. |
|
LtTruck, SUV |
These are separate tags, but both map to the "SUVs and Pickups" and "Vans" content folders in lumen. |
|
HGV |
Maps to the "Trucks" content folder, as well as picks up the "cylindrical tanker" which is in the construction folder. |
|
Bus |
There isn't a specific bus folder, but this maps to the "Short Bus", "Tourism Bus" in the "Transportation" folder and the "School Bus" in the "Special Purpose Vehicles" folder. VISSIM has a multi-segment bus ("bendy" bus), which we classify separately than a normal bus. So if the VISSIM entity has a single segment, it's a normal bus. If it has multiple segments, it maps to the lumen "Long Bus" content item (see pics below). |
|
Bike |
VISSIM has many motor bikes and bicycles, but Lumen doesn't have any motorbikes with riders, so this only maps to "Omarie" which is a bicycle w/ a character in lumen. |
|
Ped |
Pedestrians that map to the "Walking" characters content folder. Currently import is disabled for pedestrians as it isn't working well. |
|
Train |
Maps to the single "Train USA" lumen content. |
|
Tram |
Maps to the single "Tram" lumen content |
When we classify the vehicle type, we then pick at random the lumen content to stand in for the animation. In some cases, lumen content has different center points than the VISSIM which requires a little tweaking height wise, so if you see some content that is floating, it most likely is because it doesn't share the same center as the VISSIM model and you will need to do some manual tweaking for the content item.
Create Animation output
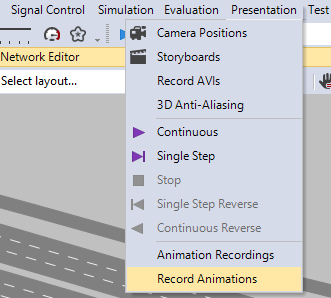
From the VISSIM main menu, select Presentation > Animation Recordings. This opens the Animation Recordings tab in the bottom of the user interface.
Use the [+] to add a new recording.

Provide a path and filename of the animation export (*.ani.txt) and toggle the type for Export.

From the VISSIM main menu select Presentation > Record Animations.
Run the simulation for an amount of time in order to create sufficient traffic flow.
Hint: The output file is a text file. Running the animation for too long will create an excessive and unnecessary amount of data.
This will create an output animation file that can now be loaded into OpenRoads ConceptStation.
OpenRoads ConceptStation Lument RT traffic animation
Once the animation recording is complete, the resulting data model can be attached in OpenRoads ConceptStation. Lumen RT visualization will then animate this traffic using the conceptual design.
Animation model attachment
In OpenRoads ConceptStation, open the model used in the export.
Go to Backstage > Attach model. Change the file type from *.3mx to VISSIM Animation Files *.ani.text. Browse the animation export folder defined in VISSIM. Select the file.
Hint: Model can also be attached using the Main Scene > Bottom Drawer > Model tab:


VISSIM Traffic Visualization
To visualize the traffic within the conceptual design model, go to the Backstage > Visualize.
The traffic animation will process automatically and the VISSIM model is visualized within the scene.
